A Box!
I did stitch it out today!
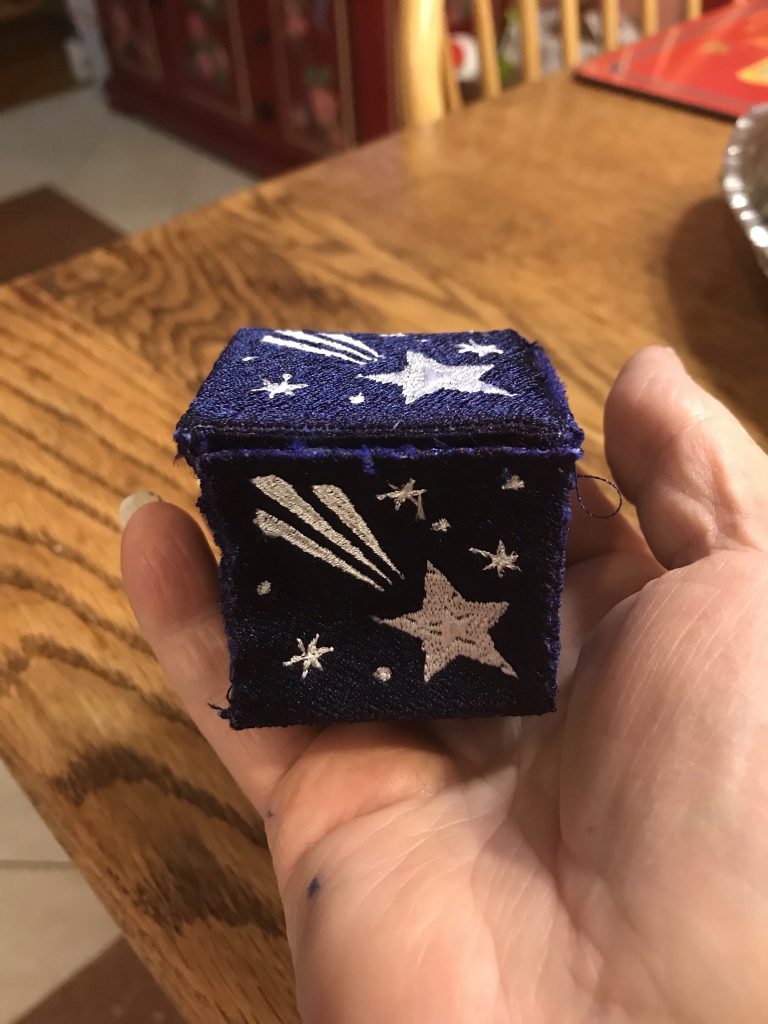
Oh! I see lots of threads in the picture that I didn’t see live!
Well, it’s not a perfect box, but I did learn a lot when I made it.
- Use another layer of stabilizer.
- Remember to check and make sure the proper foot is on the machine.
- Block the finished design
- Face the design before cutting it out
- Leave enough fabric/stabilizer to sew proper seams
This was stitched with a layer of heavy tear away stabilizer, and a layer of cut away stabilizer. No fabric was used, but it’s not FSL (free standing lace) so wash away stabilizer will not work. It’s approximately 1.5″ per side.
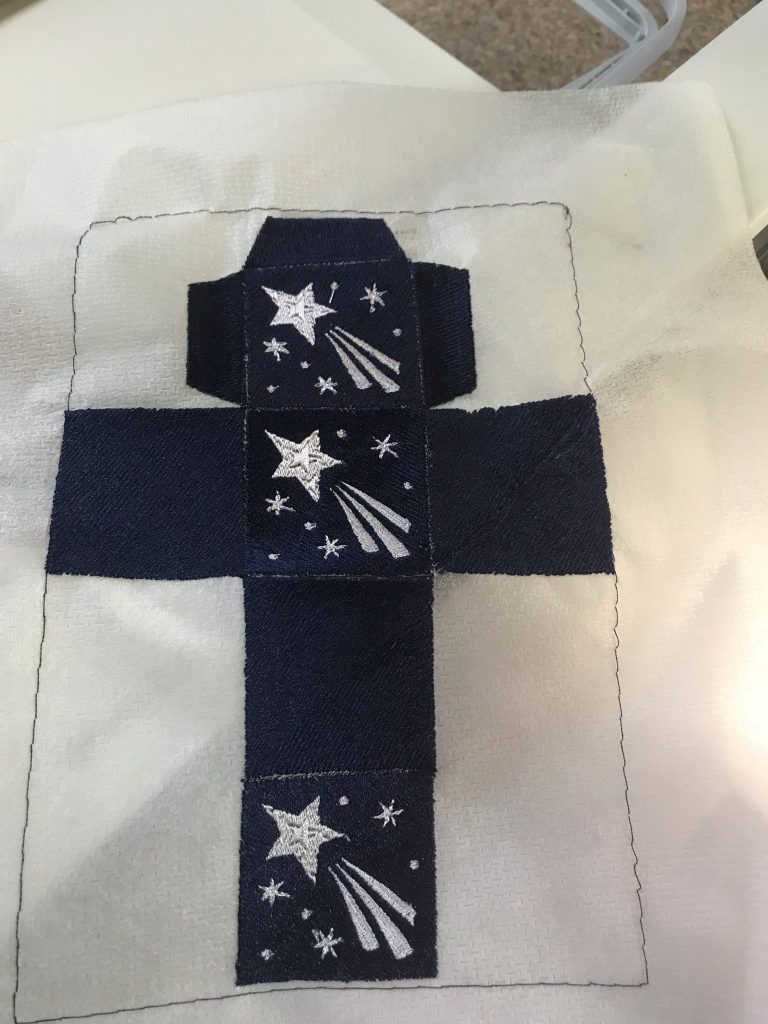
Just out of the hoop 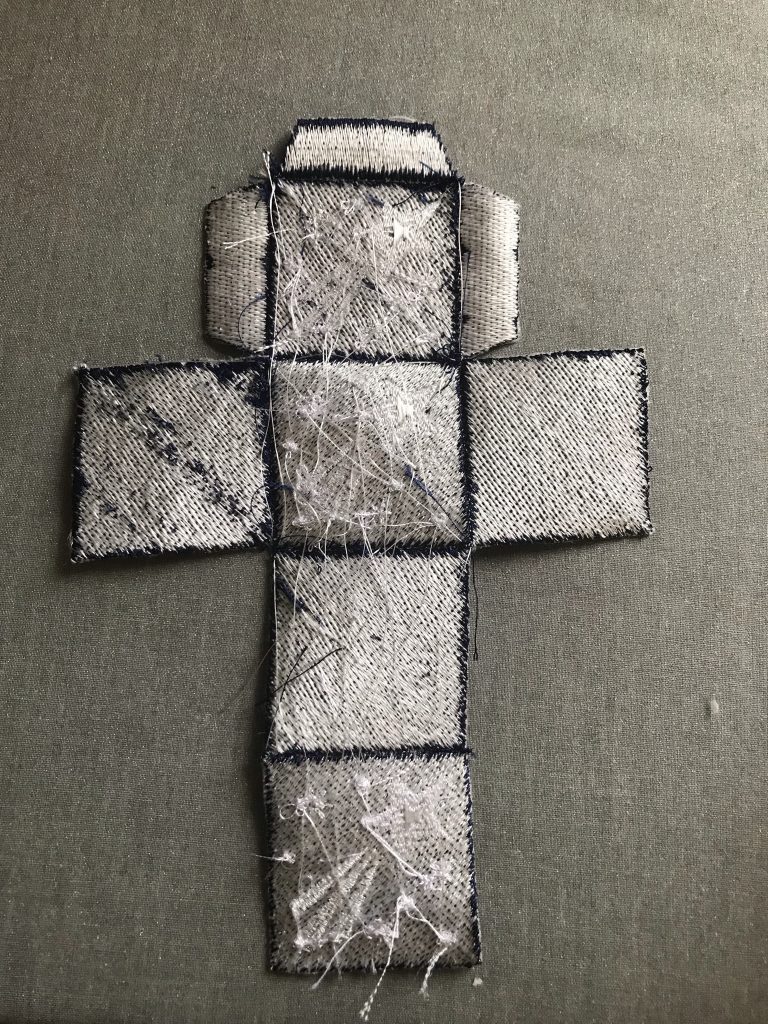
Back before facing 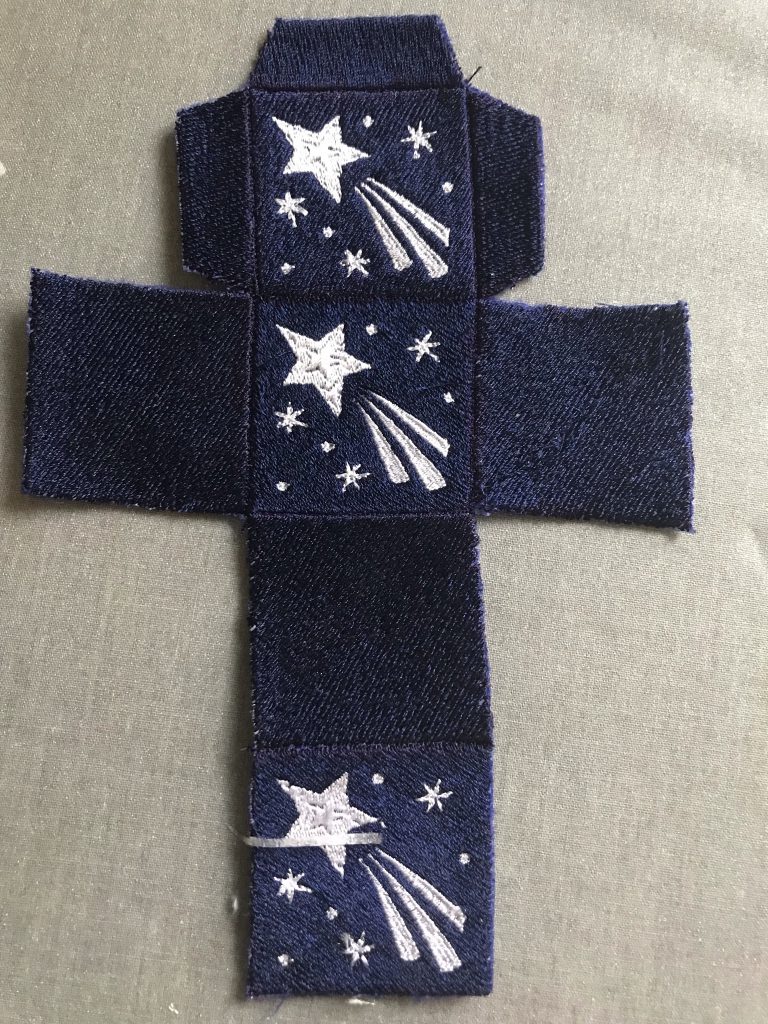
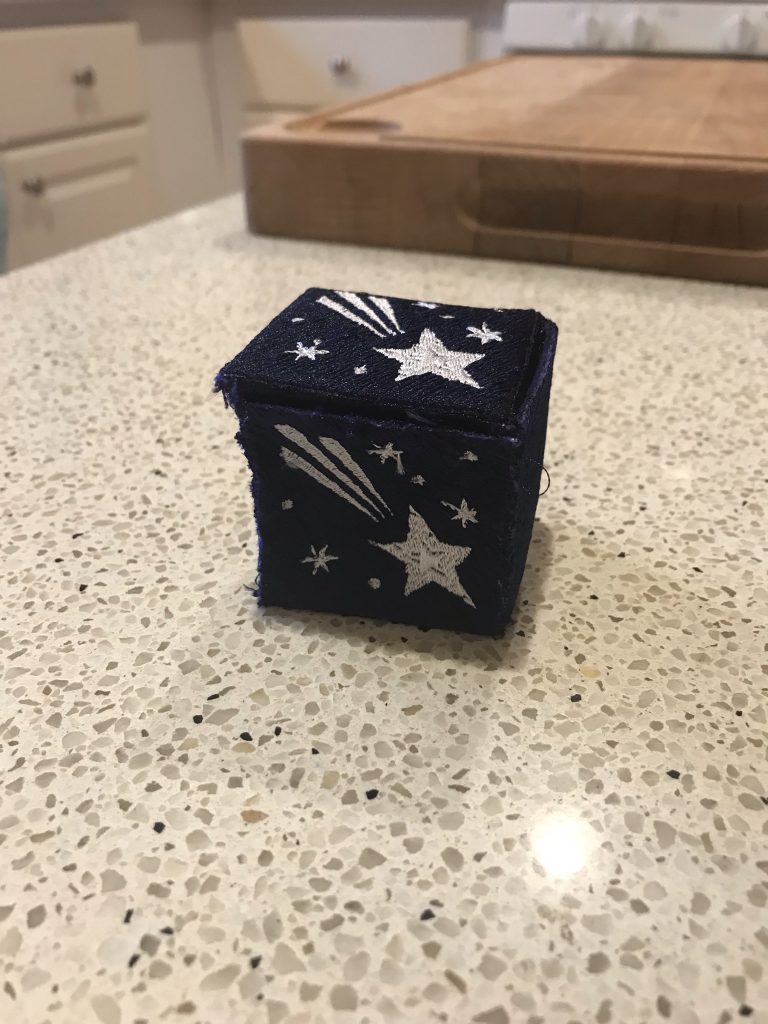
Cut out and faced 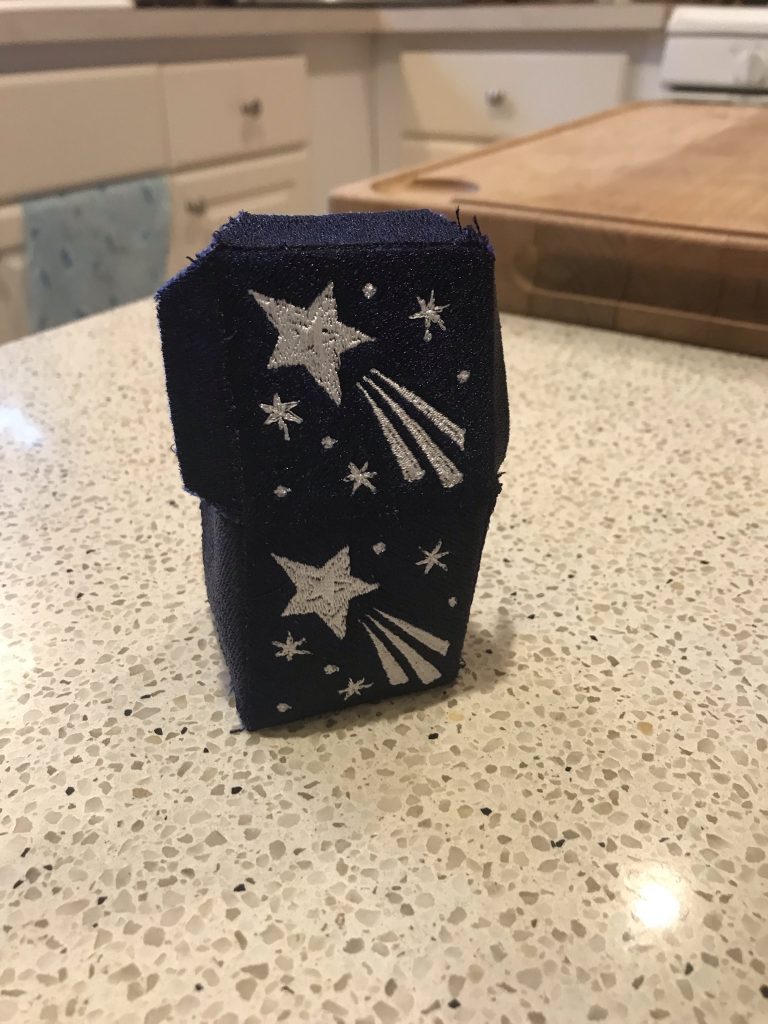
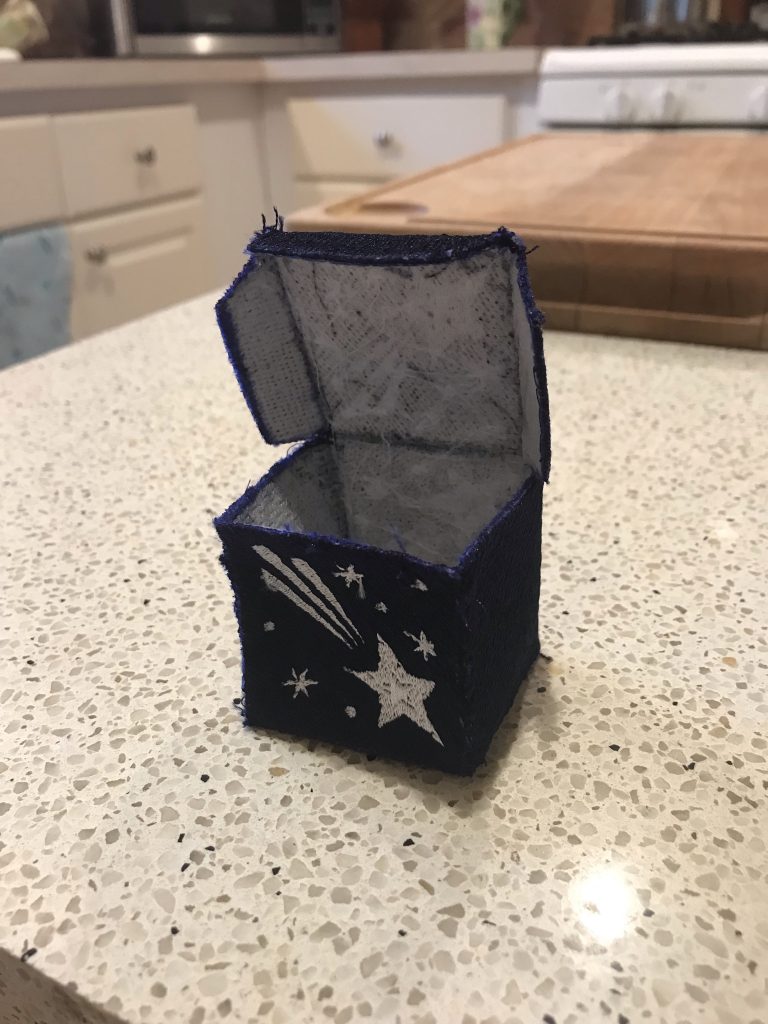
You can see in the second picture why it needs to be faced. I just ironed on another layer of stabilizer. It would be really nice to line it, especially if it were a gift box, though a heavier facing may be enough.
I also need to redo a few things in the design itself. I drew a line to separate each side when I digitized it. but that left a small gap between the connected sides. It made the folding easier, but required a Sharpie to hide the gaps at the edges.
So… I went back and redigitized the box. I made it with several different backgrounds.
You need to open these pictures in a separate tab and click them to full size to see the background design. (I really hate the way WP adds the shadowing with the caption at the bottom, and that it doesn’t let me choose the size to make the images, or let me link individual images when grouped.)

squares 
flowers 
stars 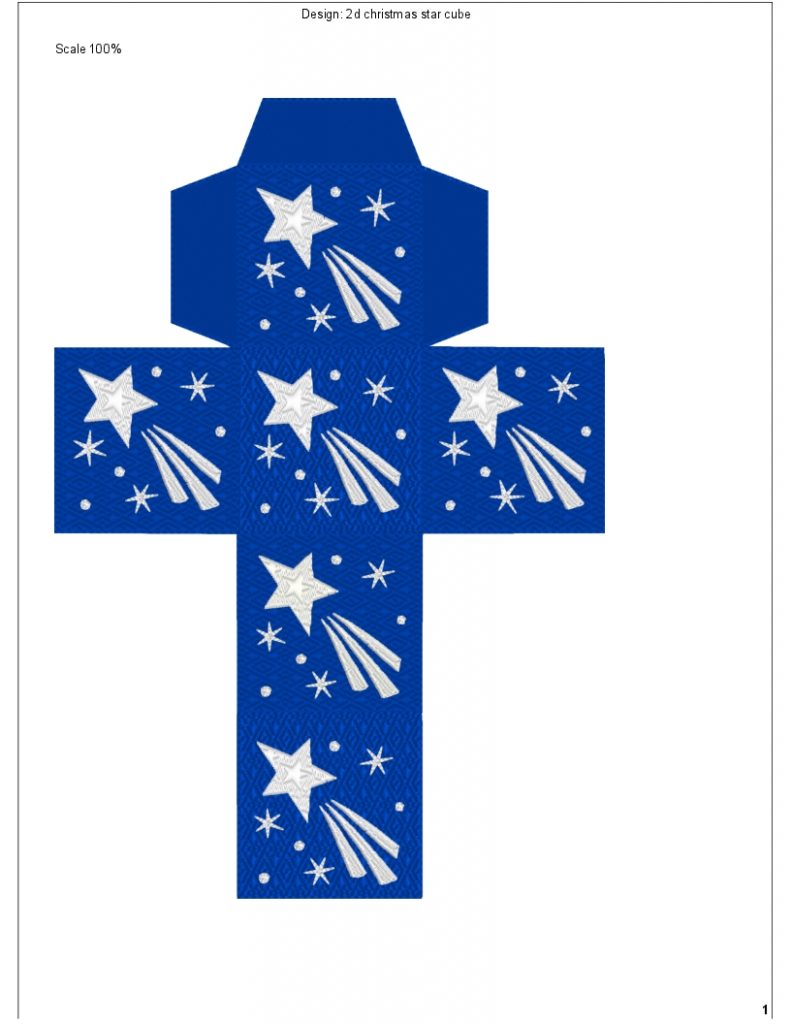
diamonds 
square spirals 
standard 
satiny standard 
This week, I hope to stitch one of the new digitizations… probably satiny standard or stars.
I’m not really sure why I’m doing this. If I could make it bigger, it would be a nice gift box. I may be able to size it up to the larger hoops, but the majestic hoop (360×350–largest) brings it only to about three inches. It might work out better to simply stitch a design (with minimal or no background) on fabric squares and connect them. Quilted, maybe. Some good, stiff Pellon® would make it stiff enough, and a lining would be easy. I certainly don’t need any new projects, but I’ll be thinking about that idea.
However, if the next one (from above) stitches out decently, I’ll put all of them in a new embroidery section of Fancy’s Images here for download, (I really need to redo my website!)
3 thoughts on “A Box!”
you DID and i love this box….
a Lot
I love that you detailed your process here and how it is evolving … for us and for yourself …
that and making for the sheer joy of it … no other reason needed
Hi Faith what a little beauty!
I have tried making little boxes with squares of stiff cardboard for the base structure, then covering each piece individually and stitching it all back together, numbering the pieces and the way they face each other helps a lot.
Comments are closed.